
our Blog
Seamless Gutter Installation: The Complete Process Explained for DFW Homeowners
If you've been told you're getting seamless gutters but aren't quite sure what that means in practice — or if you're comparing gutter companies and wondering what the installation process actually involves — this guide is for you. Understanding the complete process of seamless gutter installation helps DFW homeowners evaluate proposals, ask the right questions, and recognize quality work when they see it.
For homeowners throughout Fort Worth, Southlake, Keller, Colleyville, Grapevine, Trophy Club, Watauga, Hurst, Euless, Bedford, Haltom City, Benbrook, Azle, Mansfield, Burleson, and the broader DFW metroplex, here's exactly what happens during a professional seamless gutter installation — from the initial consultation to the final walkthrough.
Phase 1: The Free On-Site Assessment and Quote
Professional seamless gutter installation begins before any gutters are ordered, fabricated, or installed. It starts with a free, thorough assessment of your specific property.
What the assessment covers:
Roofline geometry measurement: The crew walks the full roofline perimeter, measuring every run length, evaluating every corner angle, and noting where valleys and hip sections concentrate runoff from multiple roof planes. These measurements drive the fabrication specifications — every number matters because the gutters will be made to these exact dimensions.
Pitch and drainage assessment: The natural slope of the roofline and the existing fascia condition determine where the downspouts should be placed and how the gutters need to be pitched to achieve complete drainage throughout every run.
Fascia condition evaluation: Every section of fascia the gutters will attach to is assessed for structural integrity. Soft spots, visible moisture damage, or areas where previous fasteners have pulled out get flagged before installation begins — because installing gutters on deteriorated fascia produces results that start failing immediately.
Downspout placement planning: The number of downspouts needed, their optimal placement based on the drainage load each section of roofline generates, and where the downspout outlets should discharge are all determined during the assessment. On DFW clay soil, discharge location planning is foundation protection planning.
Drainage situation: Any existing drainage problems — downspouts currently discharging too close to the foundation, areas of chronic overflow or foundation saturation — get noted for discussion with the homeowner.
What you receive after the assessment:A written, itemized quote specifying the gutter material, size, color, number of downspouts and their locations, and the warranty terms for both materials and workmanship. Not a verbal number — a written document.
Phase 2: Material Selection
After the assessment and quote are agreed upon, material selection is finalized. For seamless aluminum installations — the most common choice for DFW homes — this primarily involves selecting the color from the baked-enamel palette.
How color selection works:Quinn Gutters works with homeowners to select a color that matches or complements the home's exterior trim or fascia. Seeing color samples in context — held against the actual fascia and exterior wall colors in DFW sunlight — is the most reliable way to make this decision. What looks right in a catalog or on a screen often looks different on the home in North Texas's bright natural light.
For specialty materials:Copper, half-round, galvalume, and box gutter projects involve additional material specification — profile selection, finish type, and integration with the existing exterior design. Quinn Gutters works through these decisions with homeowners to ensure the final specification suits both the functional needs and the architectural character of the home.
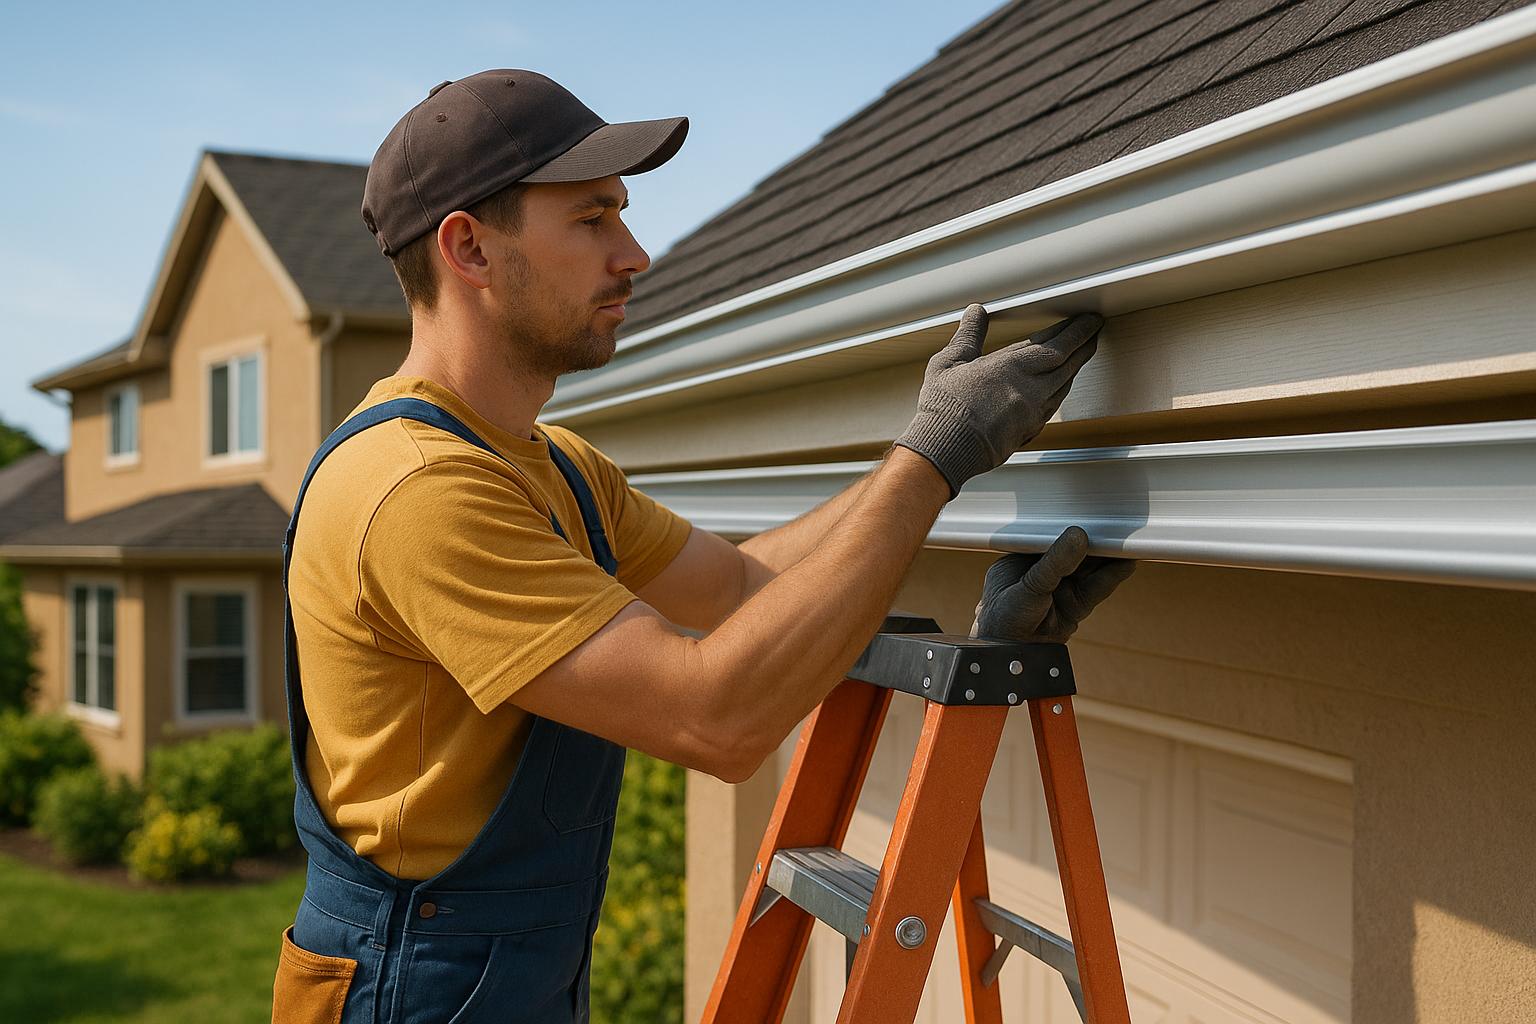
Phase 3: Installation Day — The Equipment Arrives
The defining moment of a professional seamless gutter installation is when the roll-forming machine arrives at your property. This is what makes it genuinely seamless — the machine fabricates each gutter run on-site at your home from a coil of aluminum stock, producing a single continuous piece for each section.
What the machine does:The portable roll-forming machine takes flat aluminum coil stock and runs it through a series of forming rollers that progressively shape it into the K-style gutter profile — all in a single pass. The operator sets the length for each run from the measurement sheet, the machine runs the aluminum to that exact length, and the resulting gutter section is a single continuous piece custom-made for that specific run on your home.
The machine can be seen working from the street — it's a notable piece of equipment, typically mounted in a trailer or van. If the gutter company you're working with doesn't bring one to your property, you're not getting seamlessly fabricated on-site gutters regardless of what the marketing materials say.
Fabrication sequence:The crew fabricates all runs before beginning installation — producing every piece the job requires and staging them for installation in sequence. Each piece is labeled for its specific location and has the exact length required for that run, including allowances for the corner miters and end caps.
Phase 4: Old Gutter Removal (If Applicable)
On replacement projects, the existing gutter system is removed before new installation begins. This step serves two purposes: it clears the fascia surface for the new installation, and it provides the crew with their first direct look at the fascia condition that was previously hidden behind the old gutters.
What's done during removal:Old gutters and hardware are taken down carefully to avoid damaging the fascia surface unnecessarily. The revealed fascia is inspected for any moisture damage, rot, or structural concerns that weren't visible during the initial assessment. If fascia issues are found at this stage, the crew communicates them to the homeowner before proceeding — because securing new gutters to damaged fascia is a shortcut that produces poor long-term results.
Old gutter material is collected and staged for disposal — not left scattered across the landscaping or yard.
Phase 5: Corner Fabrication and Preparation
Before any gutter sections go up, the corner connections need to be fabricated — and this is a step where installation quality really shows.
How professional corners are made:Each inside and outside corner on the roofline has a specific angle determined by the geometry of the home — and that angle needs to be accurately mitered into the corner connection piece. A 90-degree corner gets a 45-degree miter on each adjoining section. But custom homes and established DFW properties frequently have non-standard corner angles that require precise measurement and custom mitering rather than a generic 90-degree cut.
Corners are fitted, sealed with quality gutter sealant on the inside surfaces, and allowed to cure or set before installation when timing allows. Properly prepared corners are the most important single factor in preventing future joint leaks at the locations that are most vulnerable in any gutter system.
Phase 6: Installing Hangers and Setting Pitch
With the fascia clear and the gutter sections fabricated, installation begins with positioning and securing the hanger brackets that will hold the gutters.
Hidden hangers with screws:Professional seamless gutter installation uses hidden hangers — brackets that clip inside the gutter profile and attach to the fascia with screws. Spaced at 18 to 24-inch intervals throughout each run, hidden hangers with screws provide substantially better holding strength than gutter spikes and maintain their grip through North Texas's repeated thermal cycling over decades.
Setting pitch:Before the hangers are fully secured, the crew sets the pitch of each run — establishing the quarter-inch-per-10-feet downward slope toward the downspout that ensures complete drainage. This is done by hand, adjusting each hanger's position to achieve a consistent slope from one end of the run to the other.
Getting pitch right requires both measurement and experienced judgment — it's one of the quality differentiators that separate professional installation from rushed or inexperienced work.
Phase 7: Gutter Installation, Corner Connections, and End Caps
With hangers set and pitch established, the fabricated gutter sections are attached to the installed hangers and the corner connections are made.
Corner connection installation:The mitered gutter ends meet at each corner, are fitted together precisely, and are sealed from both the inside and outside surfaces. End caps are installed at every run terminus — the open ends of each gutter section — and sealed to prevent any water from exiting at the run ends rather than flowing to the downspout.
Downspout outlet cutting and installation:At each downspout location, an outlet is cut in the bottom of the gutter channel and the downspout outlet fitting is installed and sealed. The downspout itself is then cut to length, connected to the outlet, and secured to the wall with brackets at appropriate intervals.
Downspout elbows and extensions:At the base of each downspout, an elbow directs discharge away from the wall. Where underground extensions are part of the installation, the downspout connects to the underground pipe at ground level.
Phase 8: The Final Flush Test
After all gutters, corners, end caps, downspouts, and discharge components are installed, a final flush test confirms the installation performs before the crew leaves the job site.
How the flush test works:Water from a garden hose is run into each gutter run at the end farthest from the downspout. The crew observes water flow, confirms consistent movement toward the downspout without pooling in any section, checks every corner connection and outlet seal for any leaks, and confirms that each downspout is flowing freely to its discharge point.
Any issues discovered during the flush test — a corner that needs additional sealing, a section that needs pitch adjustment, a downspout connection that isn't fully secure — are addressed before the crew leaves. The job isn't done until the flush test passes.
Phase 9: Final Walkthrough and Job Site Cleanup
The crew walks the installation with the homeowner, reviews the finished system, answers any questions about maintenance or warranty, and cleans the job site completely. Old gutter material is loaded for disposal. Installation debris is cleared. Walkways and driveways are left clean.
The homeowner receives written warranty documentation covering both materials and workmanship — a written record of what was installed and what's covered.
Quinn Gutters: Every Step, Every Time, Across DFW
Quinn Gutters executes every step of this process — on-site fabrication, honest fascia assessment, proper pitch setting, hidden hanger installation, professional corner mitering, flush test verification, and clean job site — on every installation across Fort Worth, Southlake, Keller, Colleyville, Grapevine, Trophy Club, Watauga, Hurst, Euless, Bedford, Haltom City, Benbrook, Azle, Mansfield, Burleson, and surrounding DFW communities.

See the Quinn Gutters Process in Action on Your DFW Home
Request your free on-site assessment from Quinn Gutters today and let our team walk you through the complete seamless installation process for your North Texas home.


